

How To Make A 3d Hand Sculpture
How to create a realistic 3D sculpture
Creating a 3D sculpture is a great exercise in exploring traditional art techniques and honing your ability to render fine details. This realistic 3D sculpture, titled Vanitas: a Portrayal of Human Degeneration, is the work of Reza Sedghi, a 3D character artist from Iran. Sedghi has been working in the industry for over eight years, occasionally changing mediums to explore the different aspects of art. We just couldn't resist finding out about the creative process behind Sedghi's stunning 3D sculpture.
Sedghi decided to create each part of this 3D sculpture from a different stone, he's even working on a physical version of the model at the moment, also made out of different marble stones. Read on as Sedghi takes you through the creative process behind his 3D sculpture from sculpting to adding realistic mould, materials and composition.
Equip yourself to create your own 3D sculptures with our list of the best 3D modelling software.
01. Sculpt a base
(Image: © Reza Sedghi)
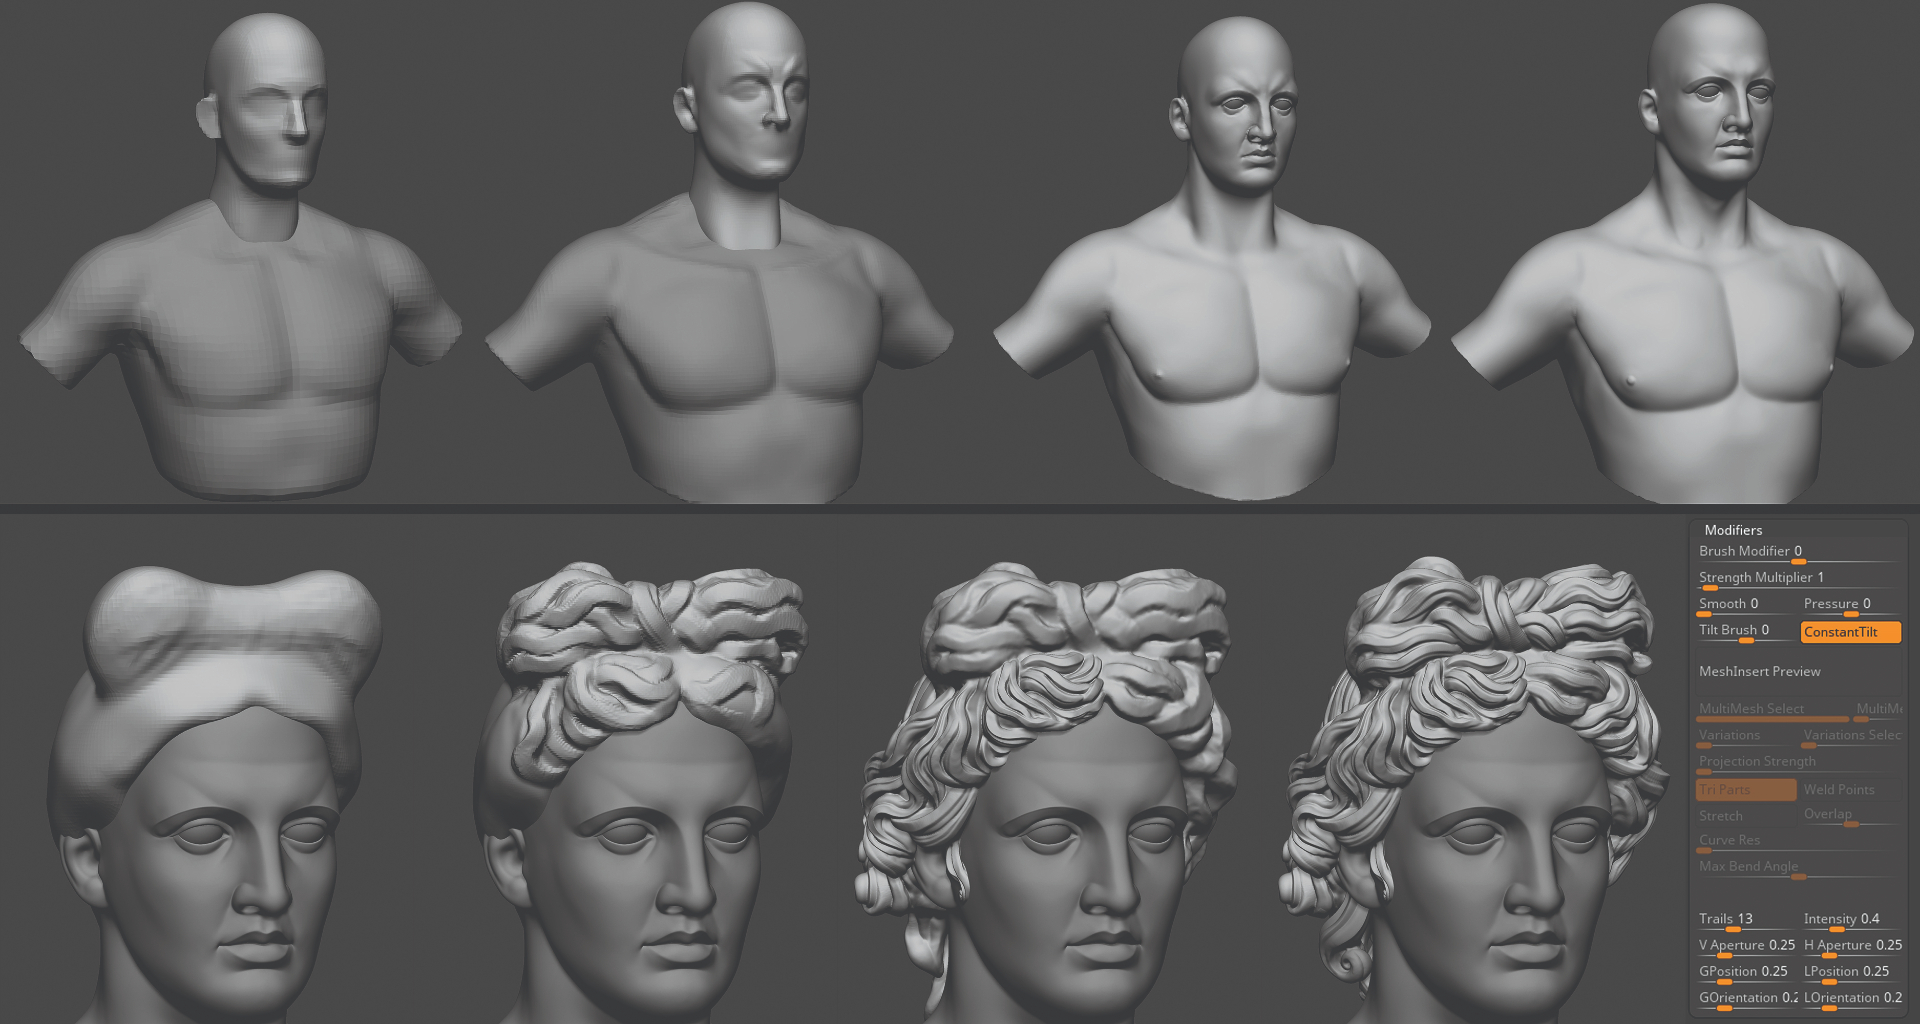
To start, I sculpted in T-pose using a sphere in ZBrush, and I sculpted the head and body separately. My aim was to capture the forms and feeling of the classic Apollo sculpture. Later I used ZRemesher to have full control over the posing. For the hair, I used a box and deformed it to match the head. ClayBuildup was utilised for deforming and creating the base of the hair. For sculpting the strands I set the Trails in the brush modifier to 13 for greater strength.
02. Tweak the pose
(Image: © Reza Sedghi)
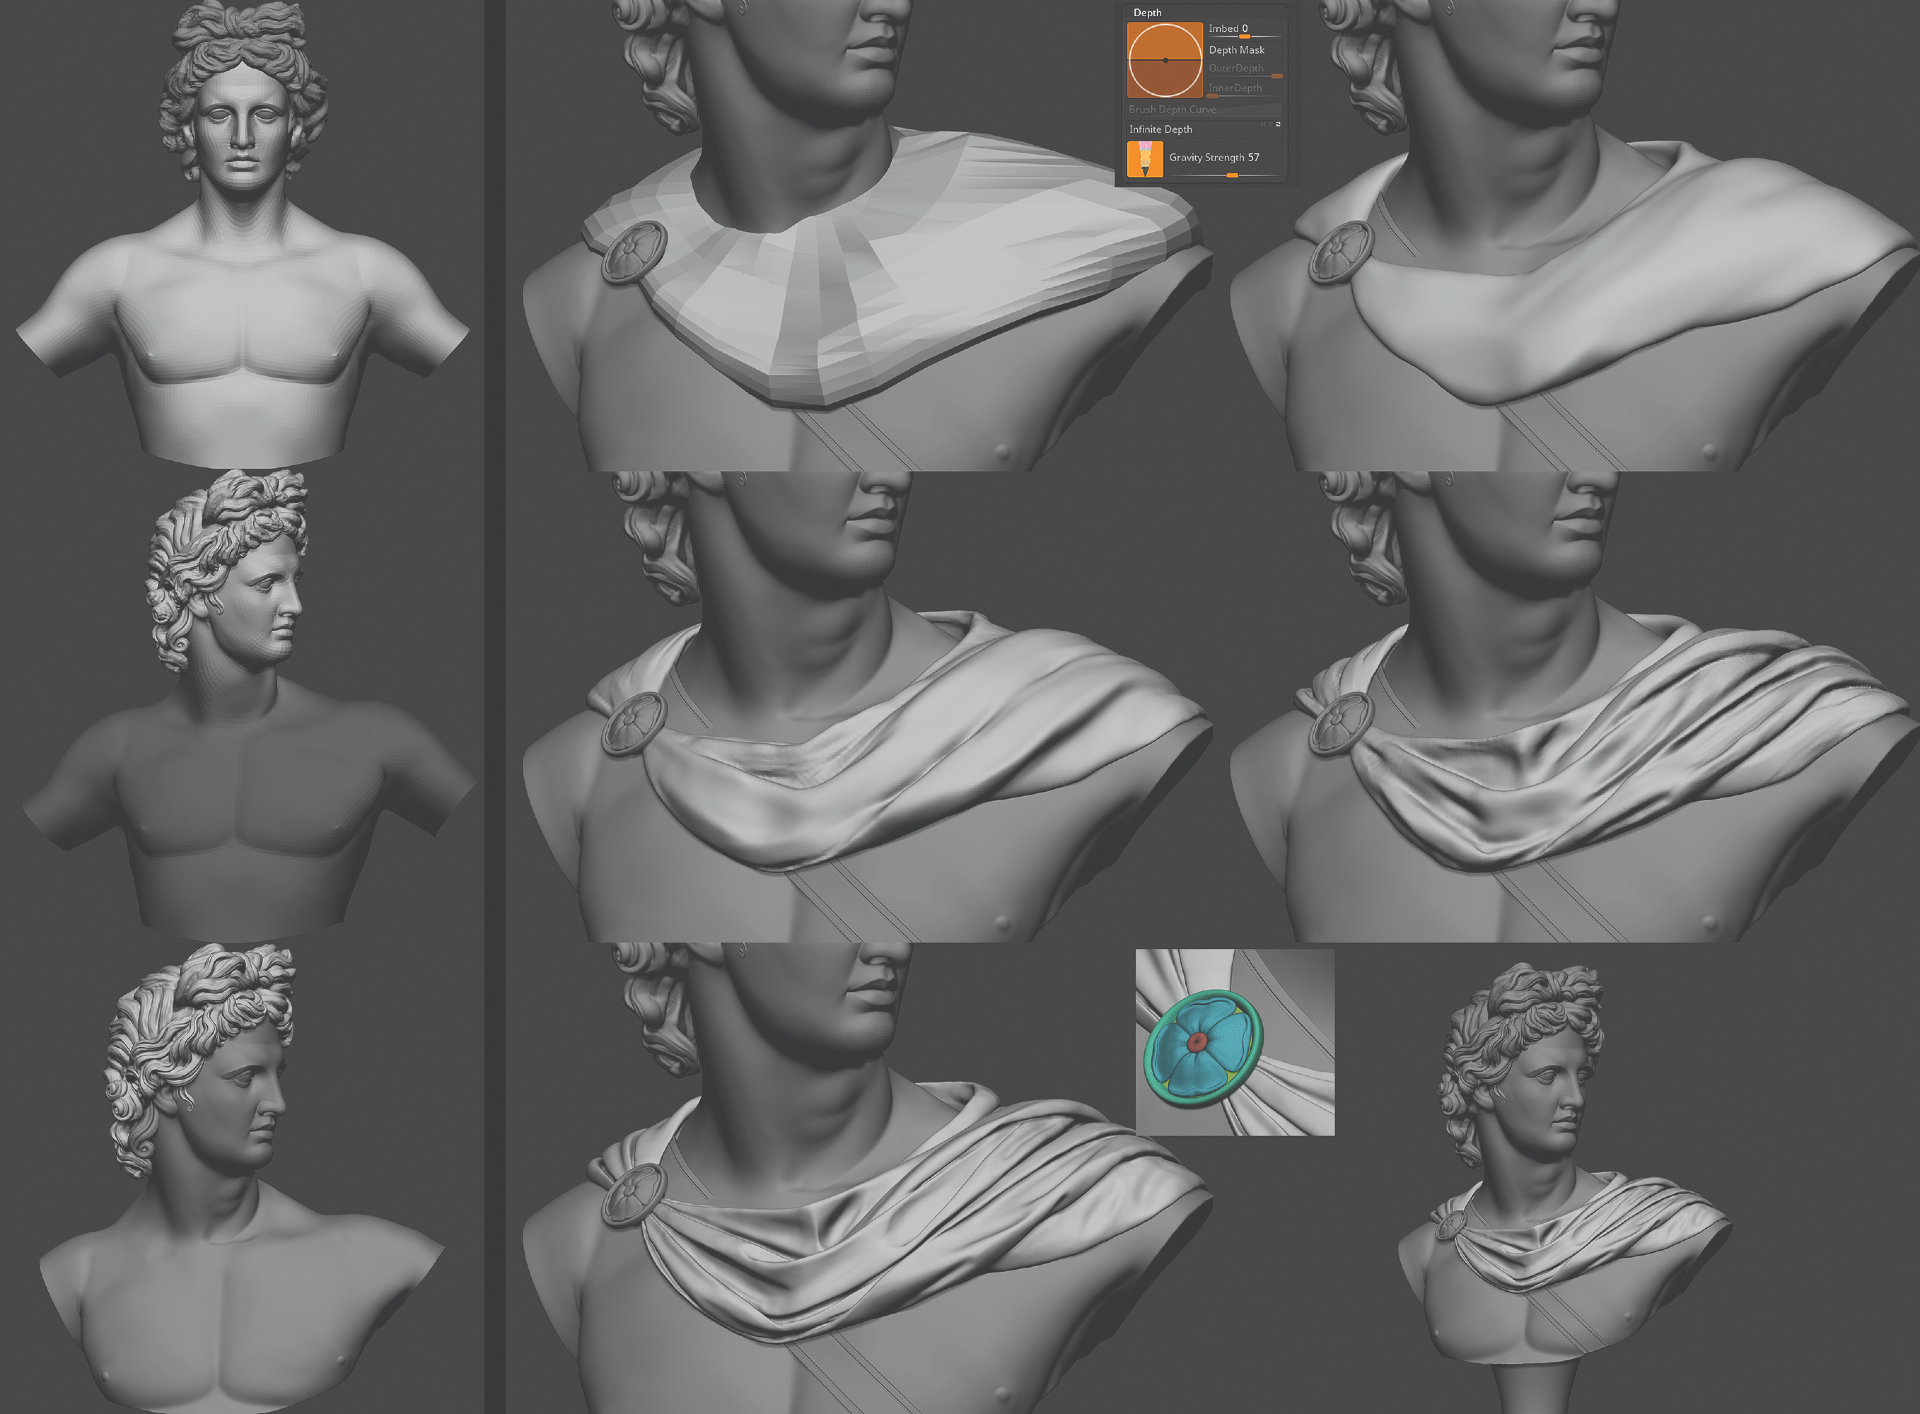
I masked the areas and created the pose; a proper topology helps you to have better control at this stage. Once you're done you can sculpt over the posed model to clean up your forms. After posing, I used a box and deformed to create the overall look of the cape, and then used DynaMesh to start sculpting. ZBrush Cloth brushes are useful for folds, but since I wanted to follow the actual Apollo's statue I sculpted it with clay and Dam Standard to bring out the primary forms, and the standard brush with gravity to create the folds.
03. Create the mould
(Image: © Reza Sedghi)
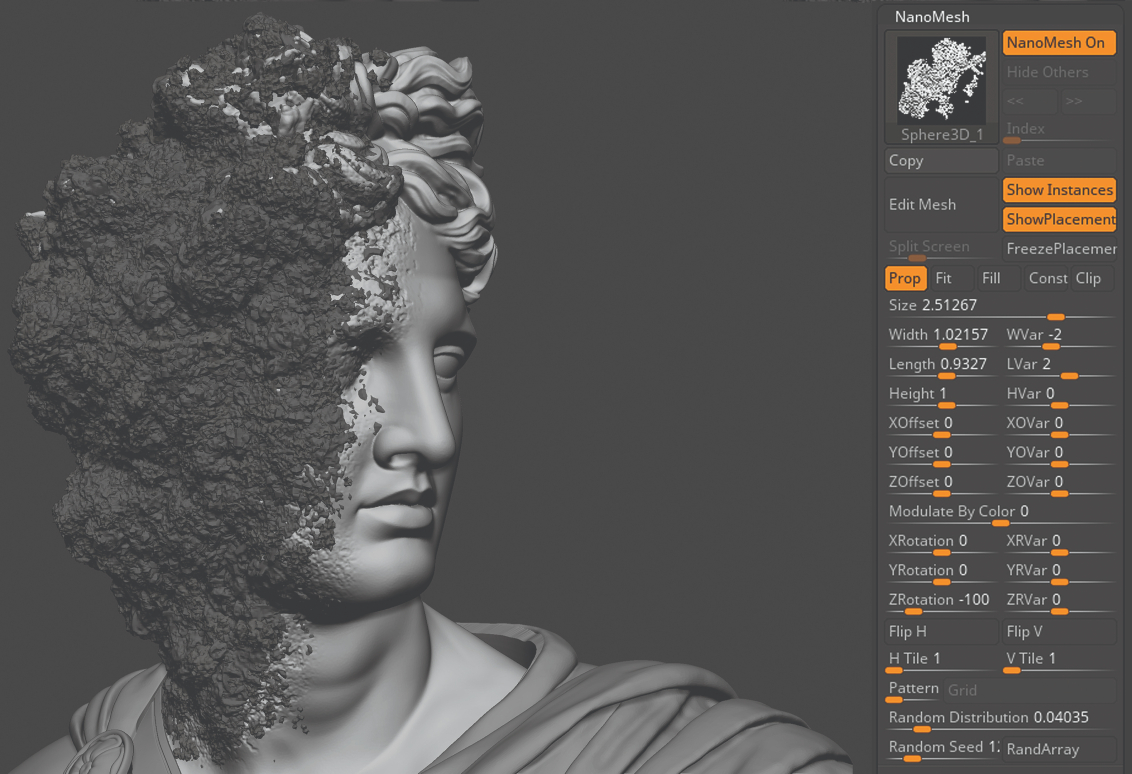
For the base of the noise I sculpted my primary forms with clay and then added the noisy effect with Noise and the Fracture brush. Later on I merged both hair and head subtools and DynaMeshed them together. After that I smoothed and tweaked the forms with clay and the Move brush. For the moulds, once I was done with my base I masked the noisy area, extracted it and used a low-poly sphere as NanoMesh over the extracted area, and randomised the placements to create the mouldy feeling. Then I added noise, DynaMeshed the whole piece and tweaked my forms.
04. Finalise the model and texturing
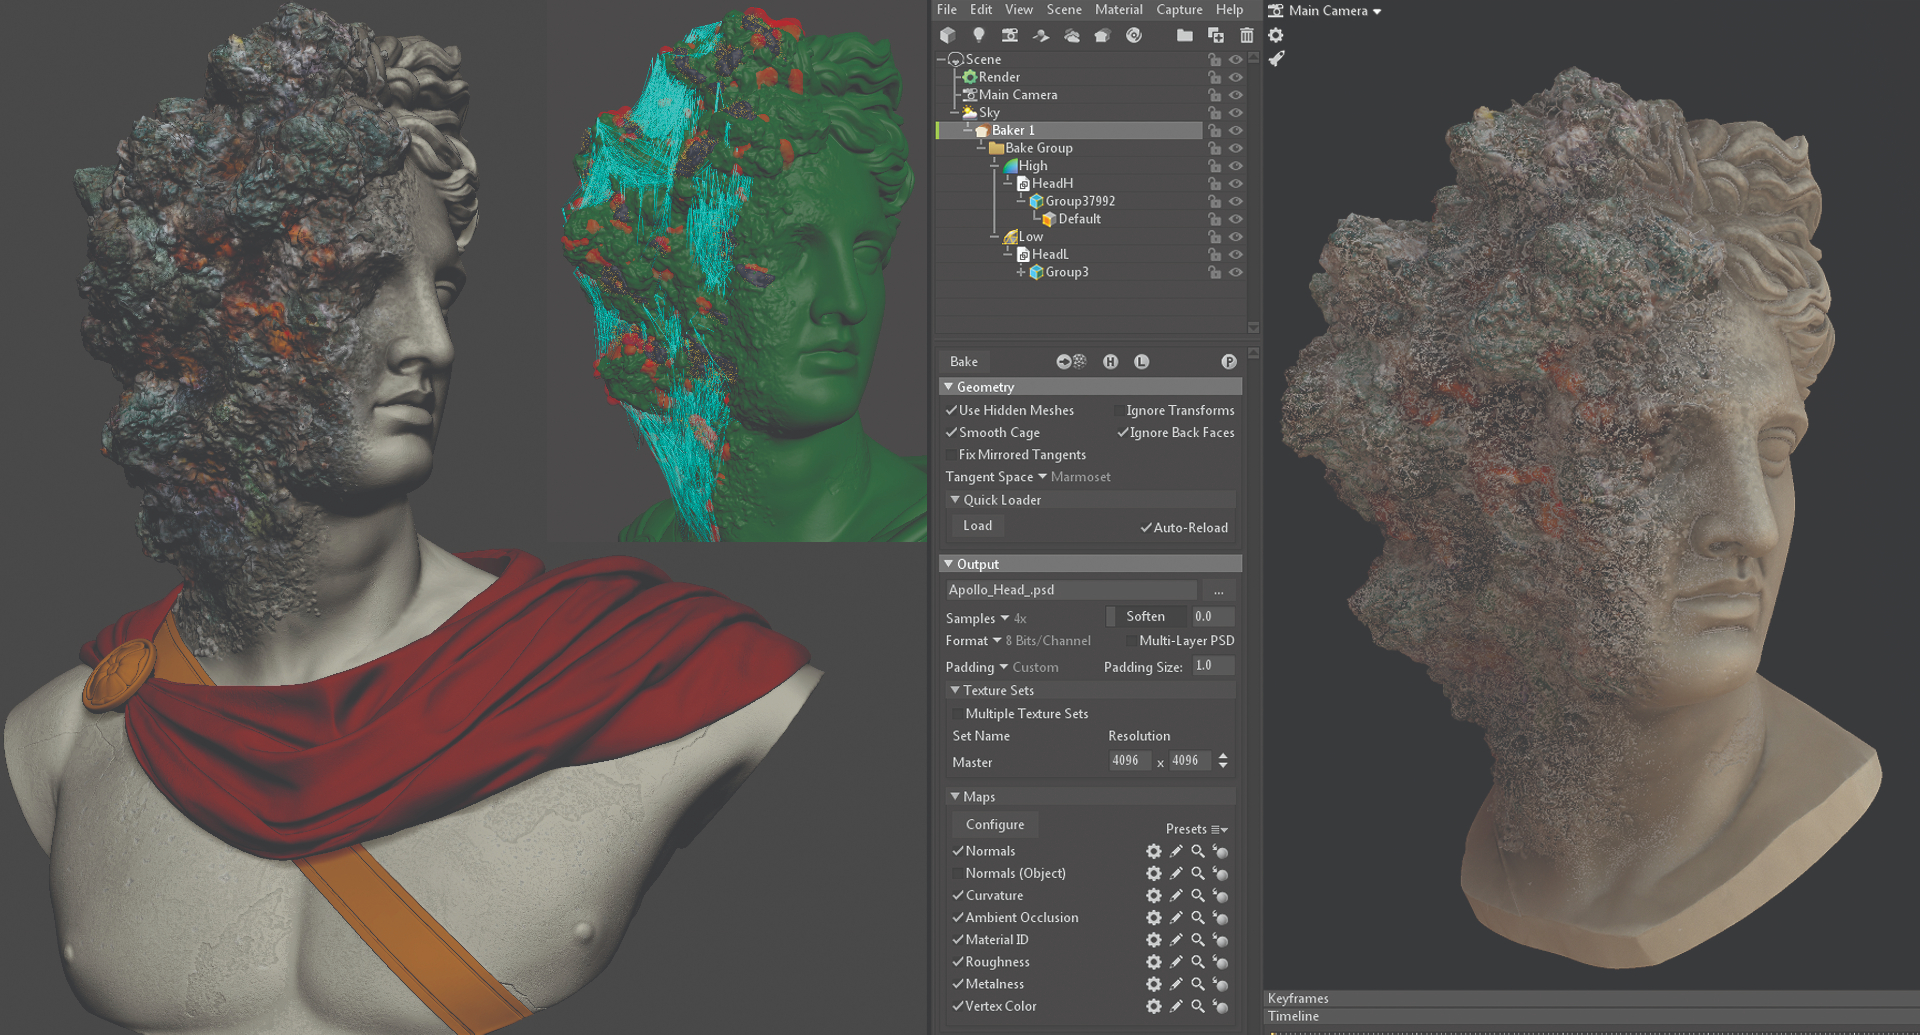
(Image: © Reza Sedghi)
For the final details I used XMD brushes for the damages and old cracks. After finishing the bust, I Polypainted the model; I didn't want a realistic colour palette, instead I went for a more abstract/stylised approach. I tried to have a mixture of colours for the moulds so it would not be too colourful, yet not just a desaturated green-white colour. I duplicated my model, used ZRemesher for a quick retopology, and did the UVs in ZBrush for fast results. I imported both the high-res and low-res in Marmoset Toolbag for baking the maps.
05. Model additional objects
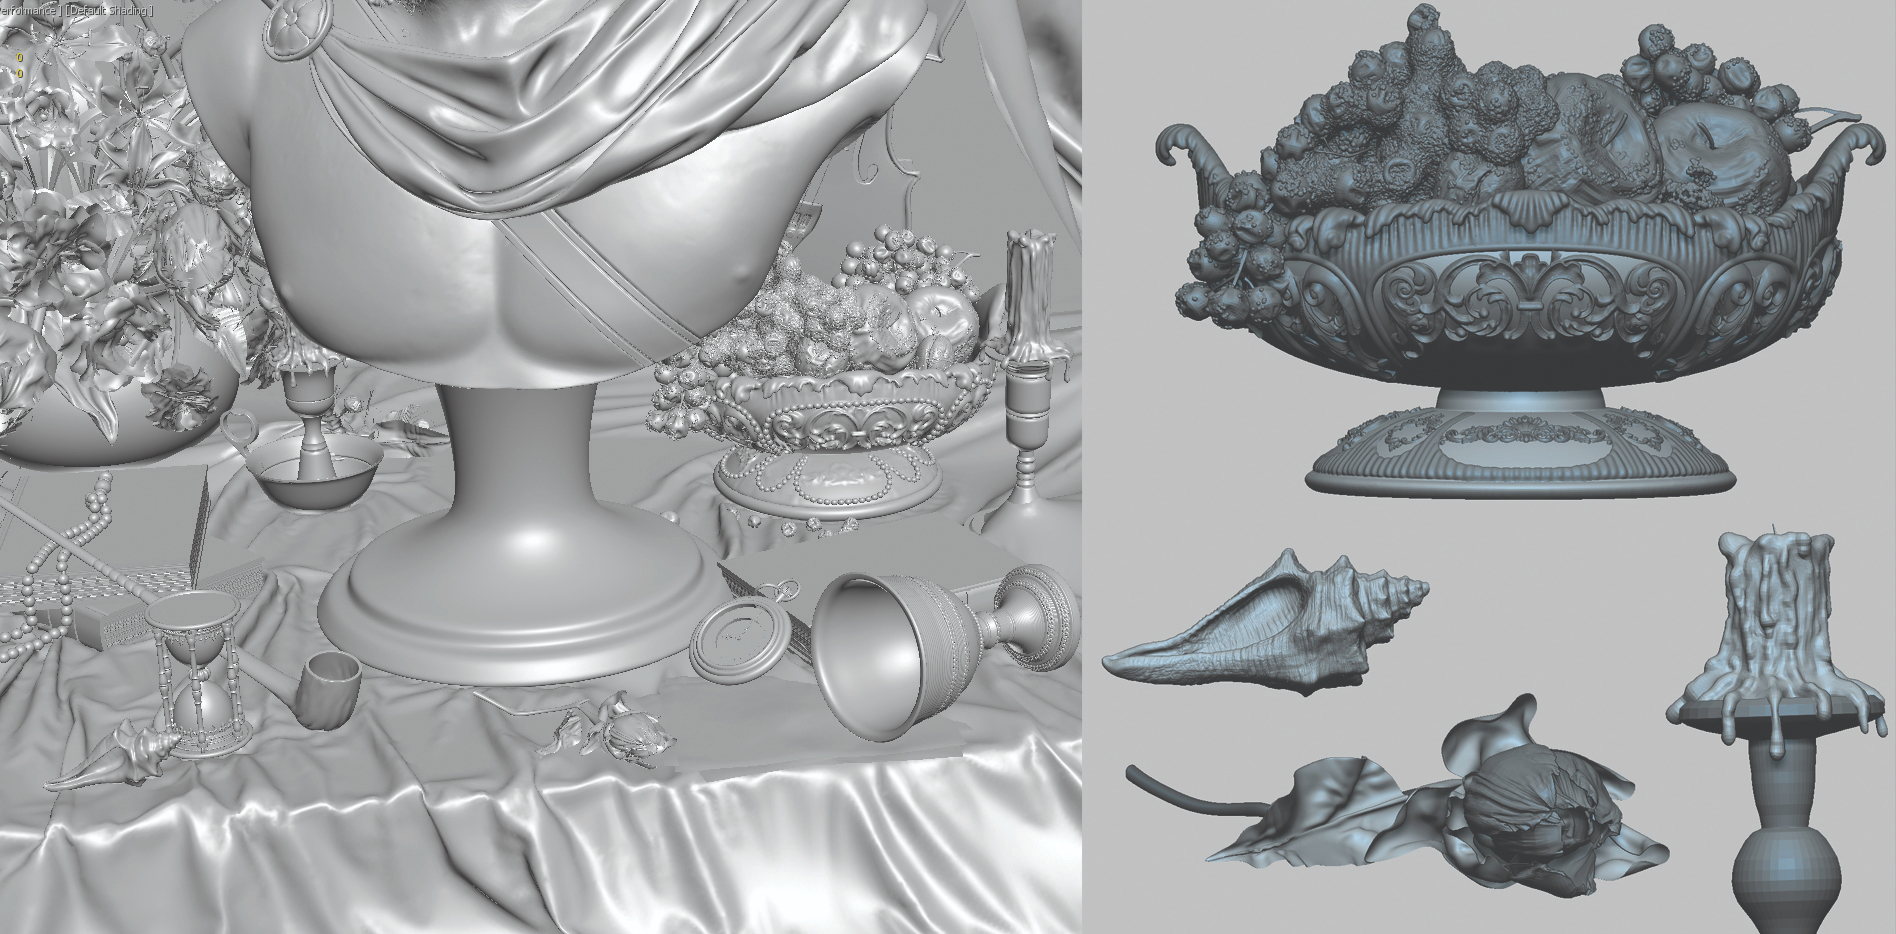
(Image: © Reza Sedghi)
For the other objects in the scene, I used 3ds Max for modelling and ZBrush for adding any extra details. For the fabrics on the ground and in the background I used Marvelous Designer, which provides a very fast and dynamic result. I utilised Polypaint in ZBrush for the texturing of fruits and flowers, and used ZBrush cloth brushes and Surface Noise for the feeling of decay. For the moulds on the fruits I used the same NanoMesh technique, but kept the model separated from the fruits to give it a volumetric material.
06. Work on materials and lookdev
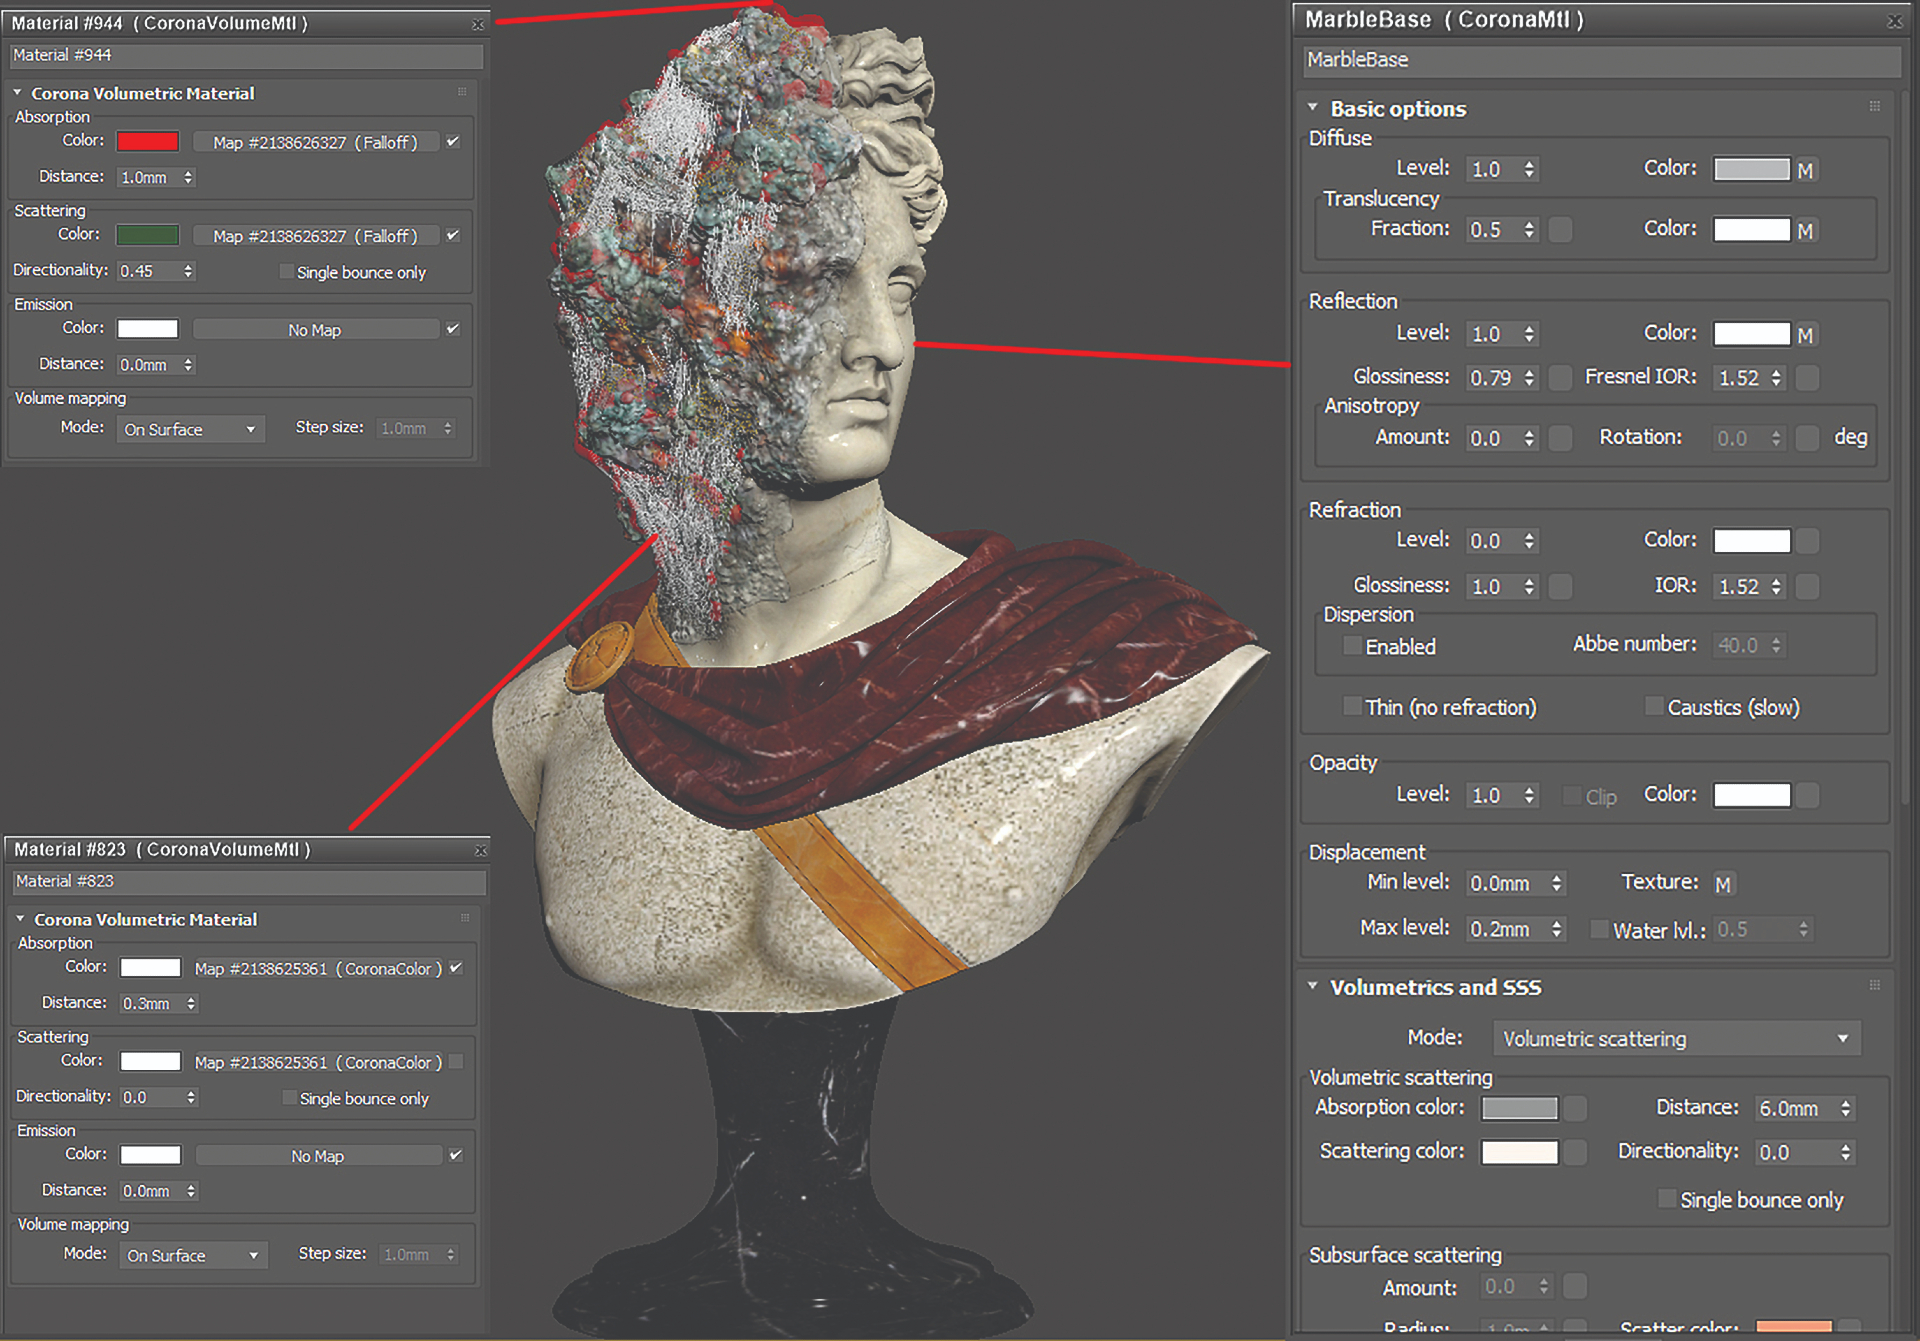
(Image: © Reza Sedghi)
Creating realistic and believable materials is challenging, but thanks to Corona Renderer, you can build up the look of the material very fast and start working on the lookdev to reach the result you need. To capture the marble's translucency, I used the Corona Marble Material preset and set the scattering Distance to 6.0mm, added the Diffuse, Normal, Bump, Displacement and Roughness map, and adjusted the Reflection to make it rough rather than shiny to create the old look. For the webs I used a volumetric material, and for the flowers I utilised CoronaAO to create a gradient of colours for the dying flowers.
07. Add dramatic lighting
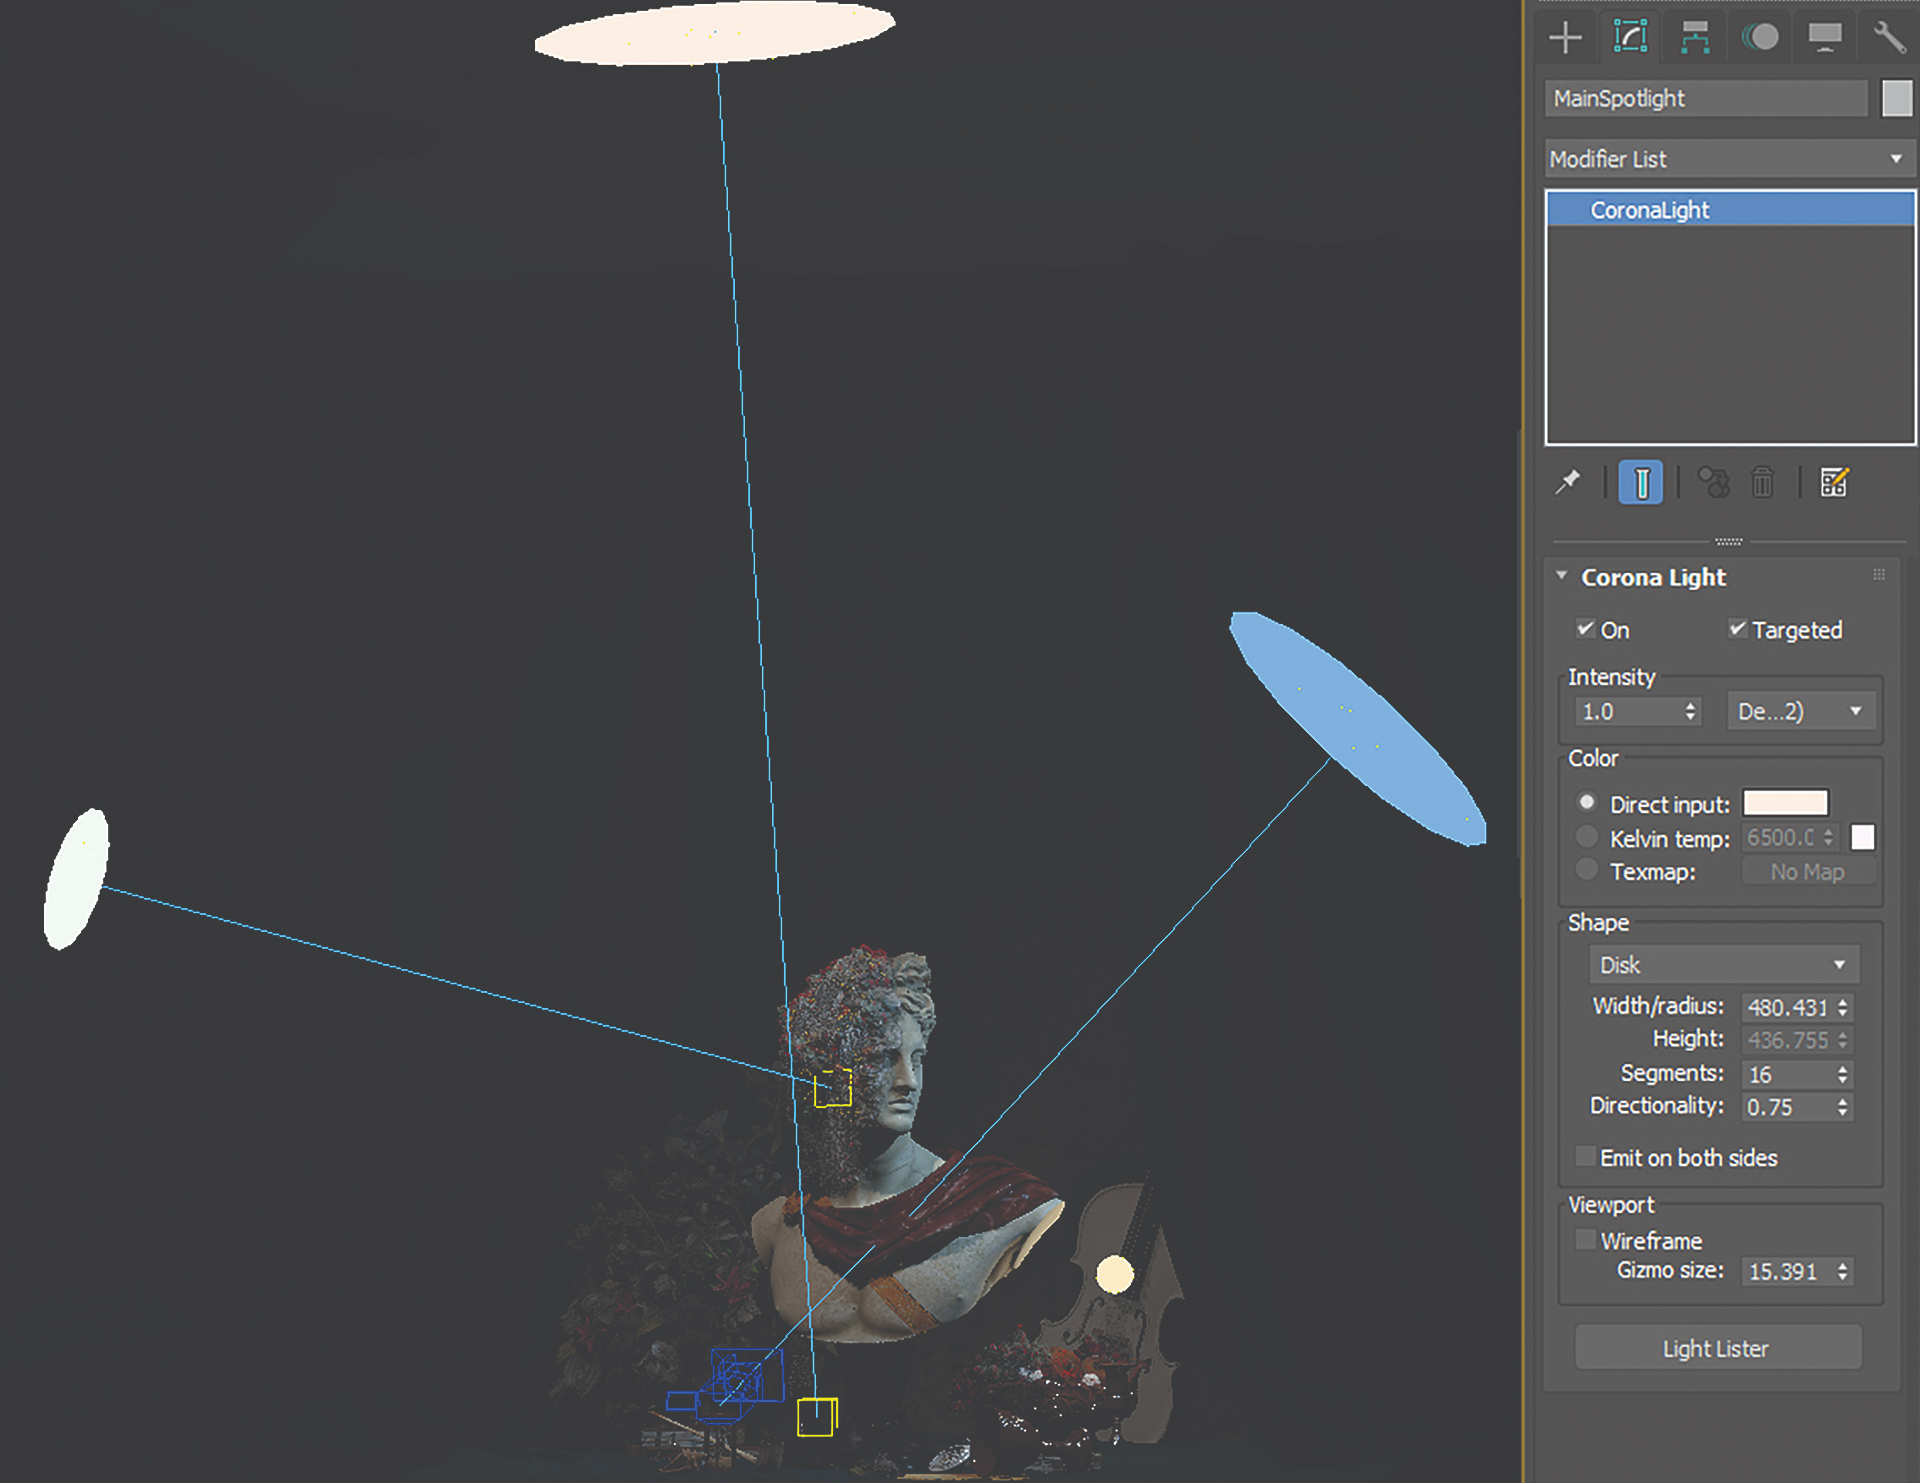
(Image: © Reza Sedghi)
Light plays a major role in narrating your story, and I tried to create dramatic lighting for this scene. I added four lights, setting their directionality to 0.75 to use them as spotlights. The key light on top is to light up the bust and the scene, the right cold light was used on the sculpture for creating a mysterious feeling. The left light has a very low power and only hits the moulds to lighten the areas a little more, while the candle, which also has low power, is added just to lighten up the fruits.
08. Consider composition and rendering
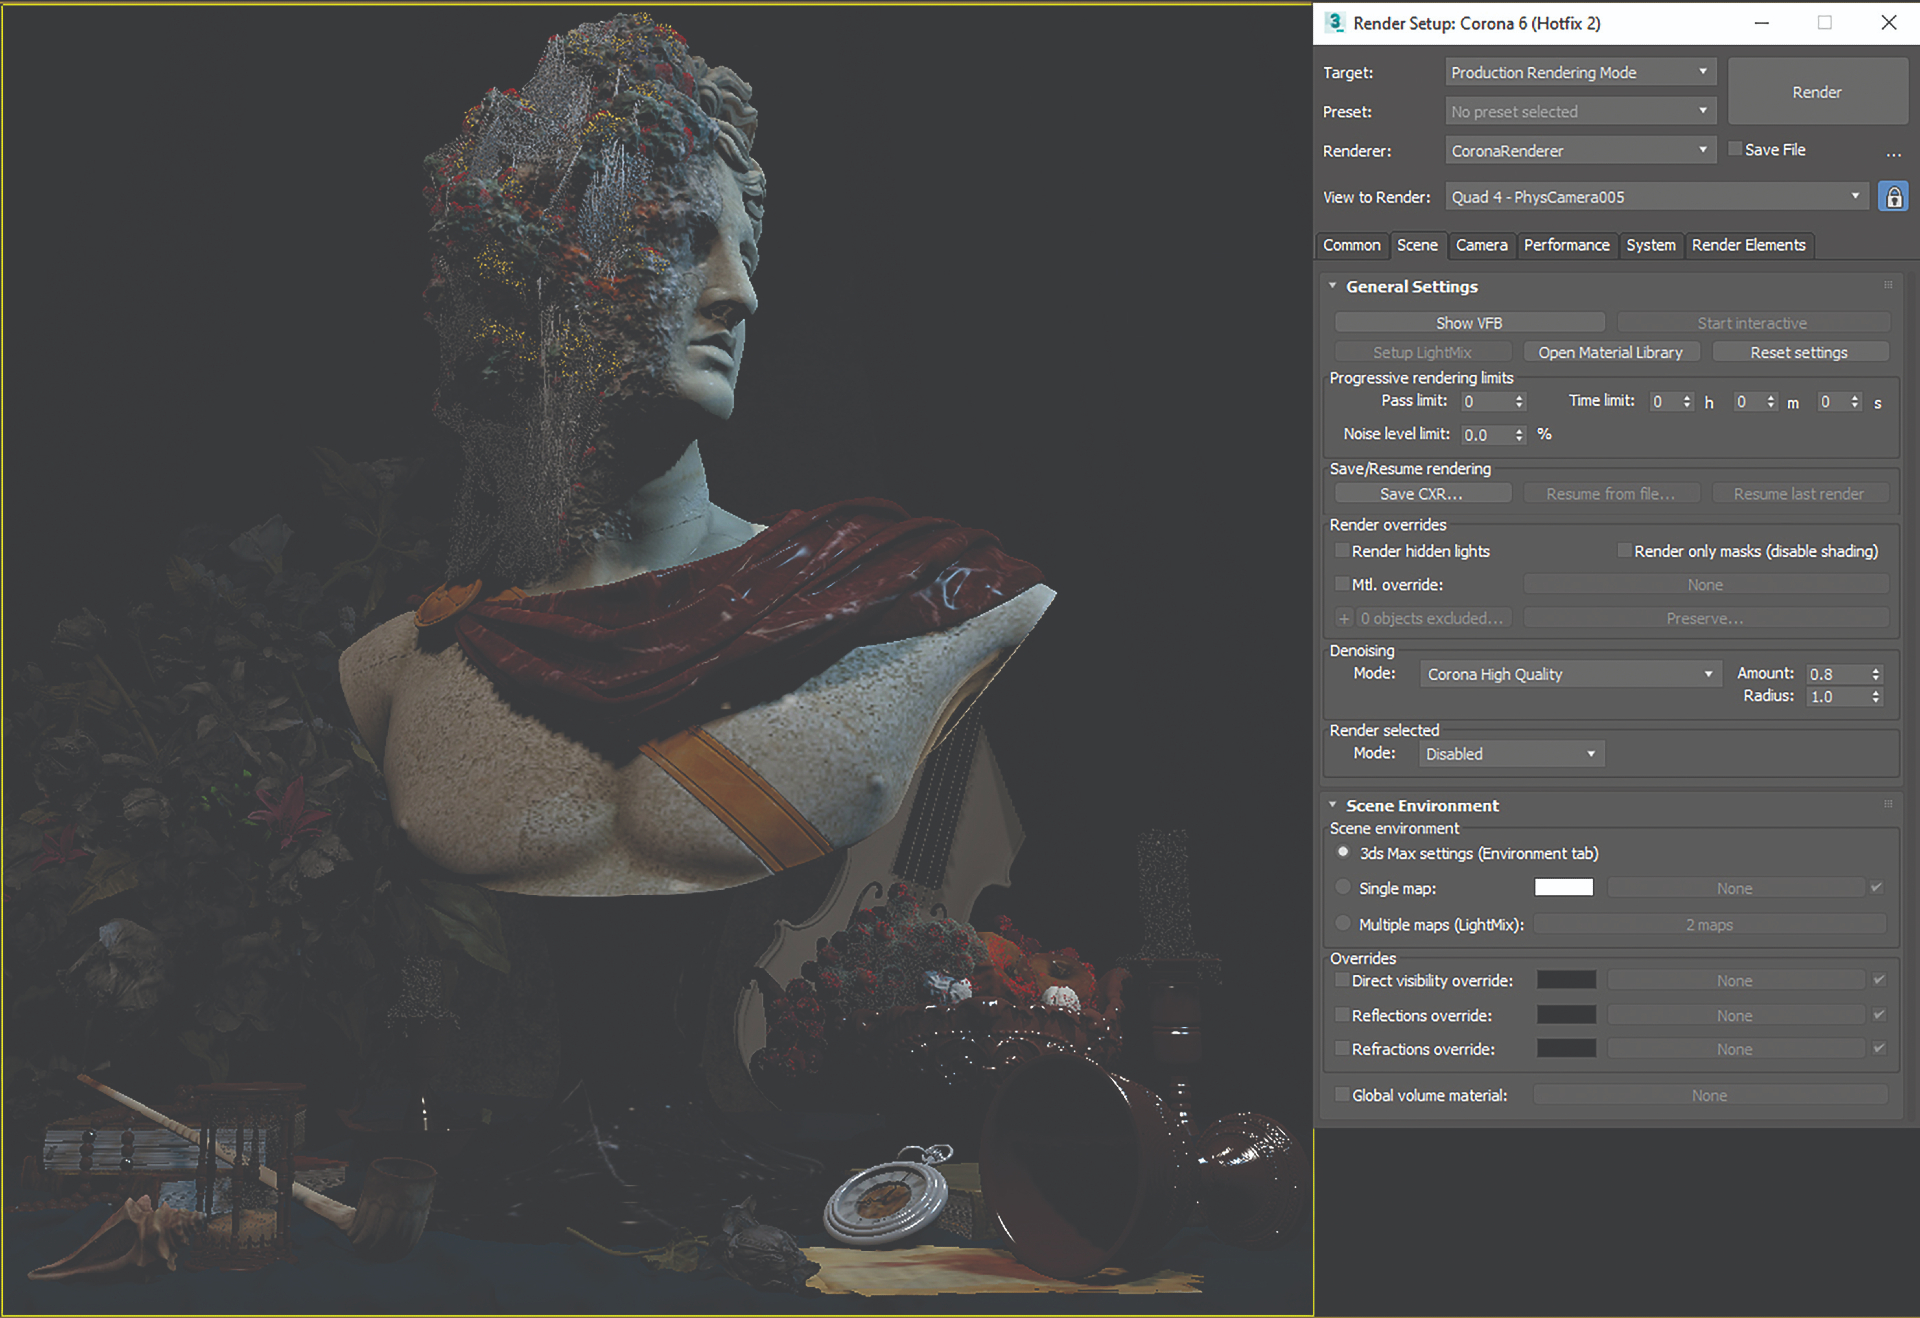
(Image: © Reza Sedghi)
Composition is one of the most important elements in image creation; it's extremely important to carefully consider the placement of each object in the scene, and how it guides the viewers' eyes to the areas you wish to emphasise. I tried to cover the bust with the assets so that they would both support the bust and narrate the story. I used a low-angle camera to add further emphasis to the bust. For the rendering, Corona Renderer's default settings work really well, and I only adjusted the denoiser. I didn't use HDRI as I was aiming to capture a dark atmosphere.
09. Polish your sculpture with post-processing
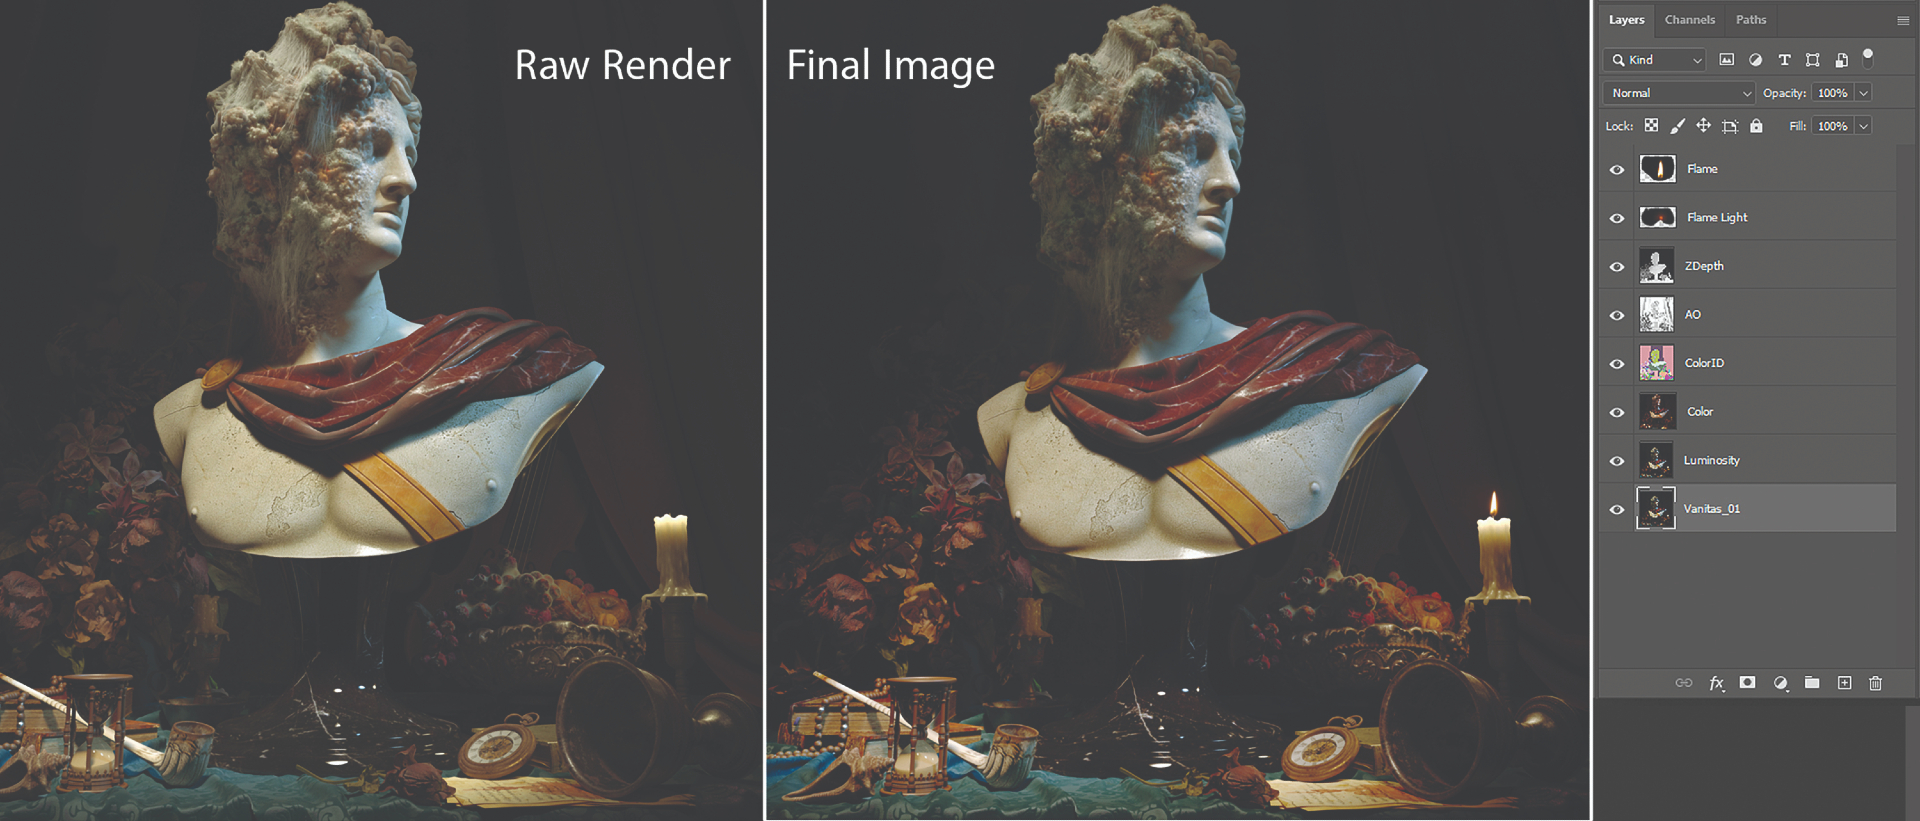
(Image: © Reza Sedghi)
Once the rendering was finished, I saved all the elements to modify them separately. The post-processing in Corona Renderer is really useful; LUTs can help to change the overall look and the colour tones in the render, and I used them as support images and as an Overlay & Luminosity layer on my main render in Photoshop. This way you can have full control over your image to change the tones, contrast, and so on. I used the depth as an alpha in my alpha channel to create the lens blur. For the final touch, I added some grain and a little chromatic aberration.
This article was originally published in 3D World , the world's best-selling magazine for CG artists. Subscribe to 3D World .
Read more:
- Best 3D pen: Model and design in 3D
- Realistic 3D portraits
- How to 3D sculpt on an iPad
Reza Sedghi is a 3D character artist from Iran. He's been working in the industry for over eight years and sometimes changes mediums to explore the different aspects of art.
Related articles
How To Make A 3d Hand Sculpture
Source: https://www.creativebloq.com/how-to/3d-sculpture
Posted by: grimesafflumad.blogspot.com
0 Response to "How To Make A 3d Hand Sculpture"
Post a Comment